Uniprint Print Center Deployment Strategy: Medium or Large Scale Deployments
This scenario covers scaling and management of Print Center Services (Pharos API) in a Web Server Farm. This set up is suitable for medium to large scale deployments i.e. sites having 3 or more Uniprint Print Servers.
Pharos recommends using the Web Farm Framework of Microsoft to simplify the provisioning, scaling and management of multiple servers. It is used to increase scalability, performance, or availability of an application.
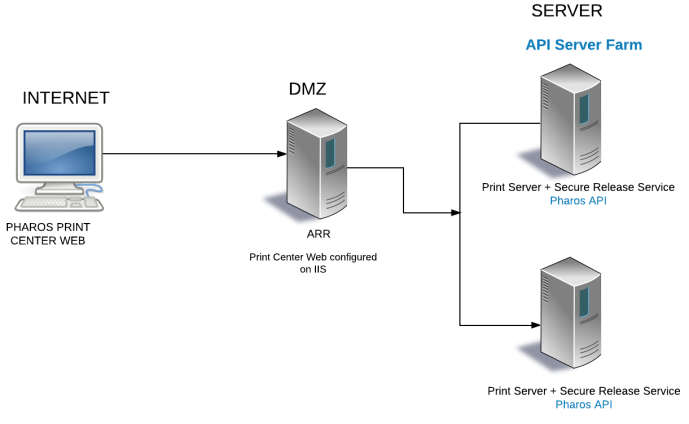
The following illustrates a simple scenario where we want to set up a web farm that is made up of two Pharos API servers and one Print Center Web with ARR. In this scenario, we have the following machines:
- Server1: RM2K8 – Machine where Print Center Web files are installed. This machine needs to be set up with ARR.
- Server2: RM2K8A – The first machine where the Print Center Services (Pharos API), the Uniprint Principal Services, and the Print Services are installed
- Server3: RM2K8B – The second machine where the Print Center Services (Pharos API) and the Uniprint Print Services are installed
Before you start:
You will need to install the following on the machine where you installed the Print Center Web before configuring your web farm:
- Install IIS URL Rewrite Module if not already installed. Download IIS URL Rewrite module from this web page.
- Install Microsoft Application Request Routing (ARR). Download ARR from the following Microsoft website .
- Install Microsoft Web Deploy. To download the installer, visit the Web Deploy Website.
Step 1: Create Server Farm on the Print Center Web
After you have installed the prerequisites mentioned above, you can start creating a web server farm. The server farm is created on the machine where you have installed the Print Center Web (the same machine where ARR is installed).
Deploying Print Center (with a single Pharos API) to an SSO environment also requires a server farm.
These steps should be performed on the Print Center Web server after installing the ARR and the Web Farm Framework.
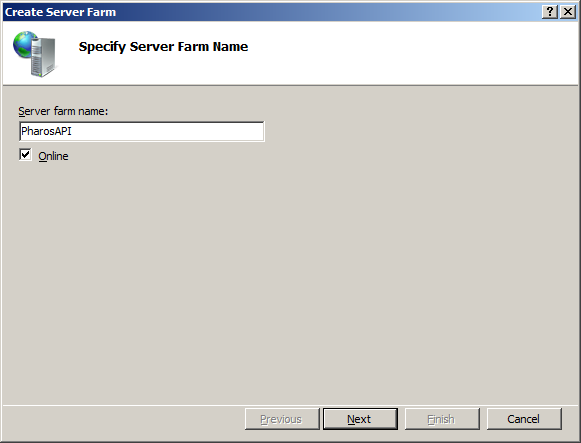
1. Open IIS Manager and click on Server Farms. In the Actions pane, click Create Server Farm. The Create Server Farm Wizard starts. Enter a name that will identify the server farm. In the following example, we are calling our farm PharosAPI.
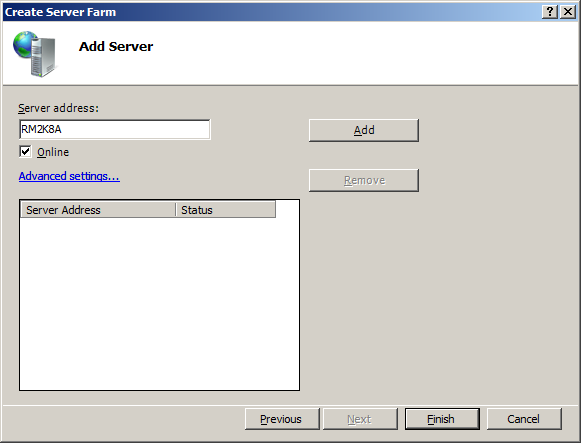
2. Expand PharosAPI farm, click on Servers. In the Actions pane, click Add Server. In the Server address field, enter the hostname of the server you want to add and then click the Add button. In the following example, we are adding Server 1 (RM2K8A) to the Server Farm.
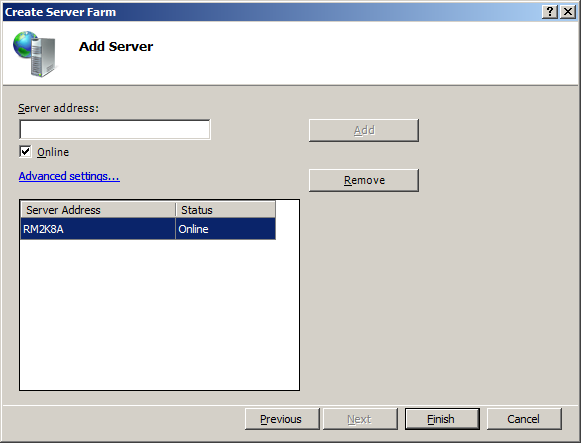
3. Repeat step 2 to add one or more servers to your farm. Click Finish once you are finished adding servers to the farm.
4. The following message will appear. Click No to exit. You can create a rule later by visiting the Routing Rules page of the server farm.

Step 2: Setting up Web Farm Features
After creating the web farm, the next step is to set up the web farm features, such as Routing Rules, URL Rewrite, Caching, Load Balance, and so on to help you manage the servers in your farm.
Defining Routing Rules
The Routing Rules feature is only enabled if the URL Rewrite Module is installed.
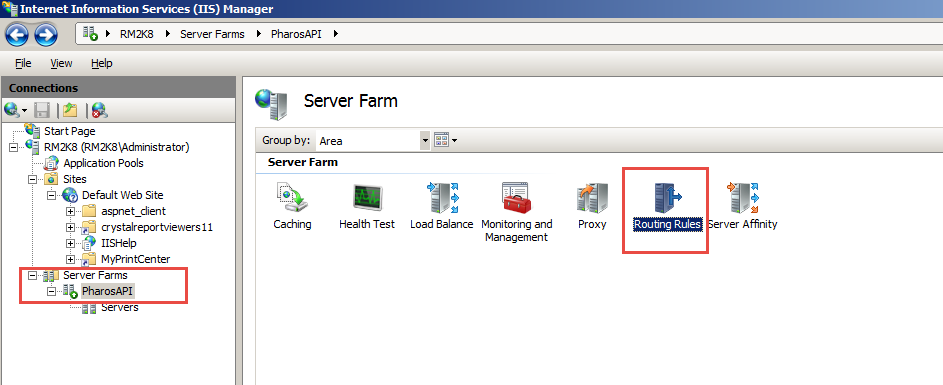
1. Expand the Server Farm option and then select the farm you have created earlier. Double-click on the Routing Rules feature.
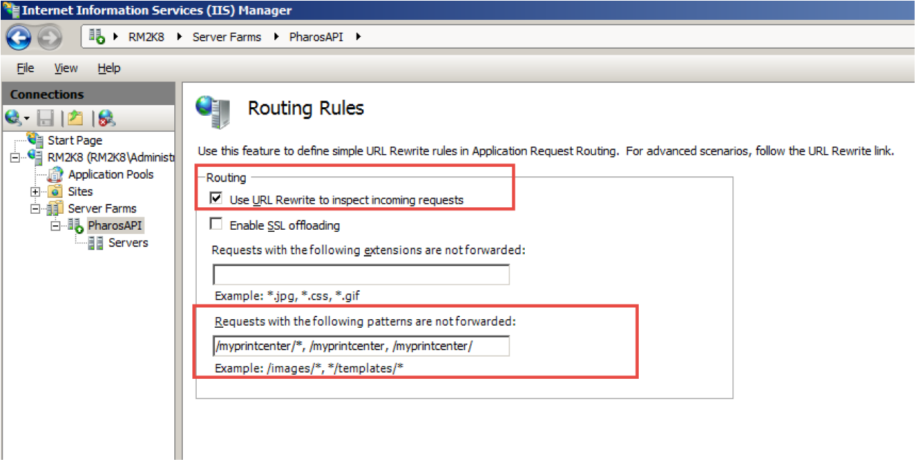
2. Enter the rule patterns that should not be forwarded to the Pharos API and then click Apply. On the following screen, all requests from “myprintcenter” should not be forwarded. Only PharosAPI requests should be forwarded to Pharos API servers.
3. Click Apply to save changes.
Update the URL Rewrite rules
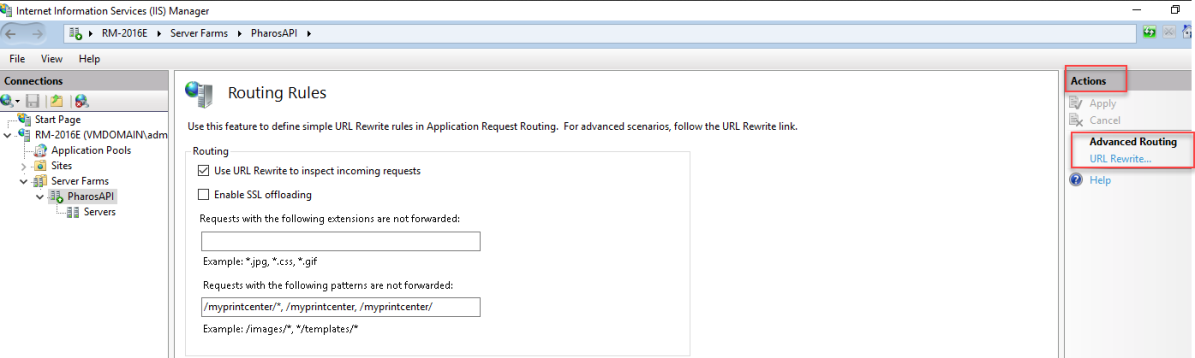
1. Expand the Server Farm option and then select the farm you have created earlier. Double-click on the Routing Rules feature.
2. In the Routing Rules Actions pane, click on the URL Rewrite feature under Advanced Routing.
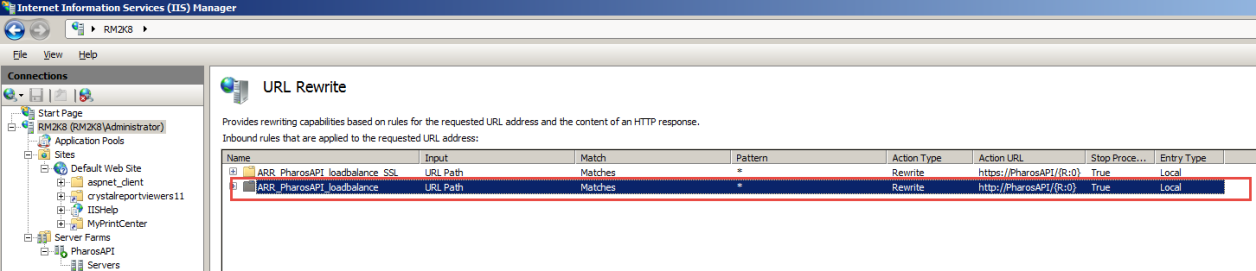
3. Since we are recommending HTTPS reverse proxy configuration, you will need to disable or remove the HTTP rule. To do this, choose the http URL rule (in the following example, it is the second rule) and click on Disable Rule or Remove Rule from the Actions pane.
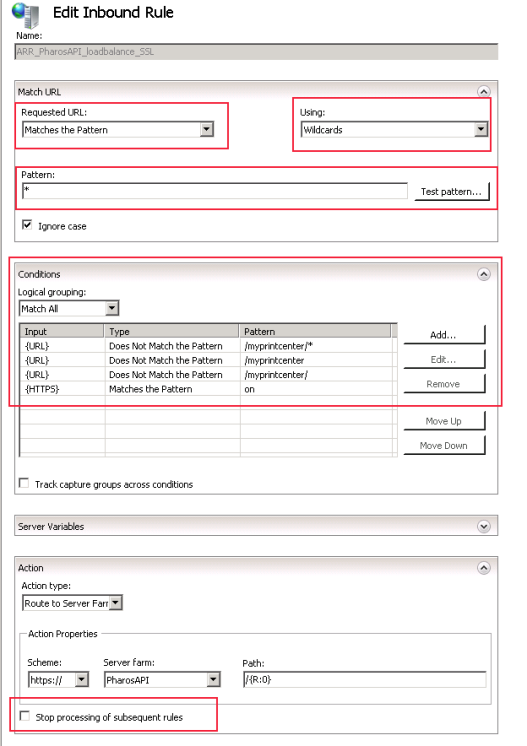
4. Double click on the https rule. This opens the Edit Inbound Rule dialog. Use the patterns in the following screenshot. All myprintcenter patterns should not be forwarded to the API Server, so the pattern type should be “Does Not Match the Pattern” /myprintcenter/*, /myprintcenter, etc. Please see the suggested patterns on the following screen:
Disable Disk Caching
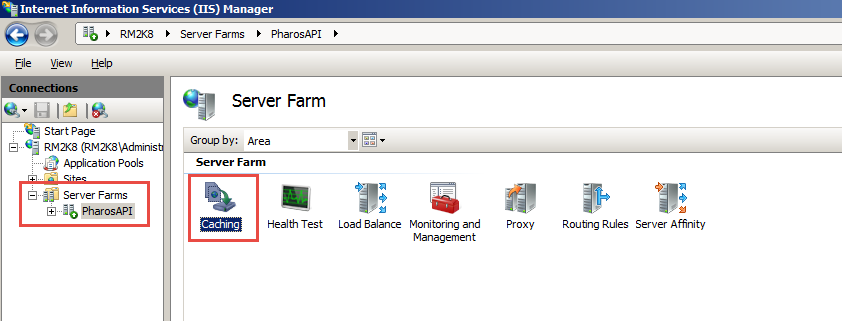
1. Select the Server Farm you have created earlier and then double-click on the Caching feature.
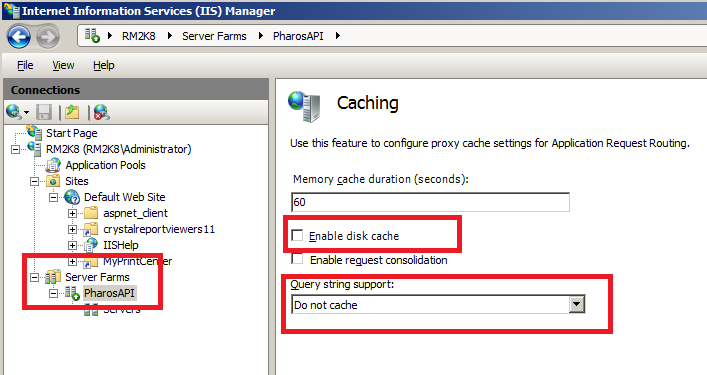
2. Disable disk cache by unchecking the Enable disk cache option and then set the Query string support to Do not cache.
Configure Load Balancing
Load balancing has to be configured to distribute HTTPs requests across multiple web servers in the web server farm, based on the availability of the servers and the load balance algorithm selected. The following section shows how to configure network load balancing using the IIS ARR. Take note that the Web Farm Framework can be configured to work with third-party load balancing solutions as well.
To configure load balancing:
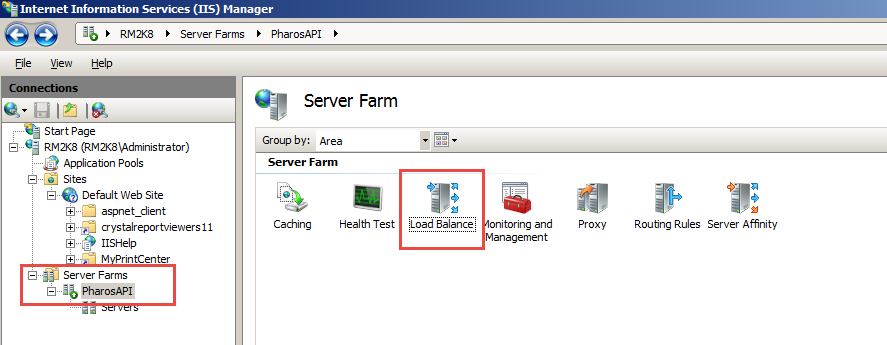
1. In the Server Farms pane, select the server farm that you have initially created. Double-click on the Load Balance feature.
2. Select a load balance algorithm and then click Apply. In this example, the weighted round robin is selected. This algorithm sends each new request to a different web server in an attempt to load all servers equally. For more information on other available load balance algorithm, please refer to this website: http://technet.microsoft.com/en-us/library/dd443524(v=ws.10).aspx.
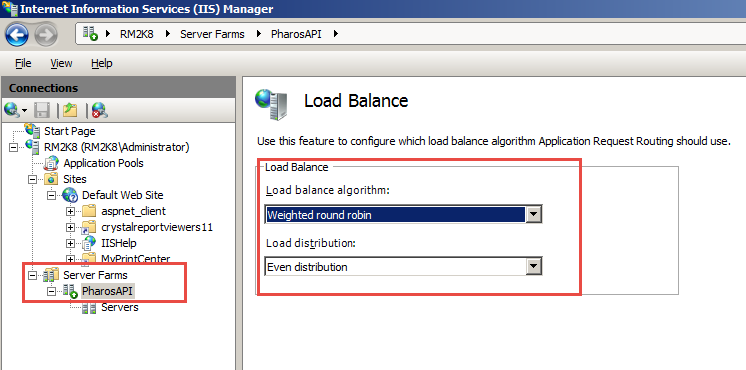
3. In the Actions pane, click Apply.
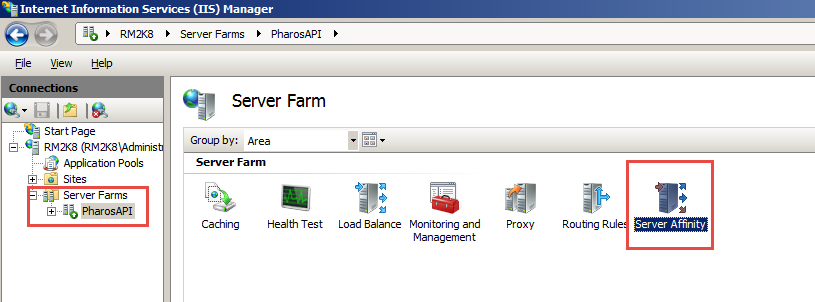
Configure Server Affinity
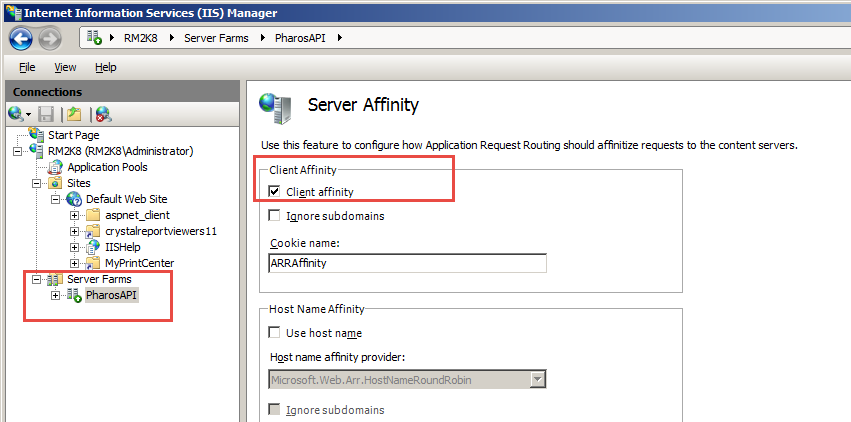
1. Select your Server Farm and then double-click on the Server Affinity feature.
2. Check on the client affinity option as shown in the following image.
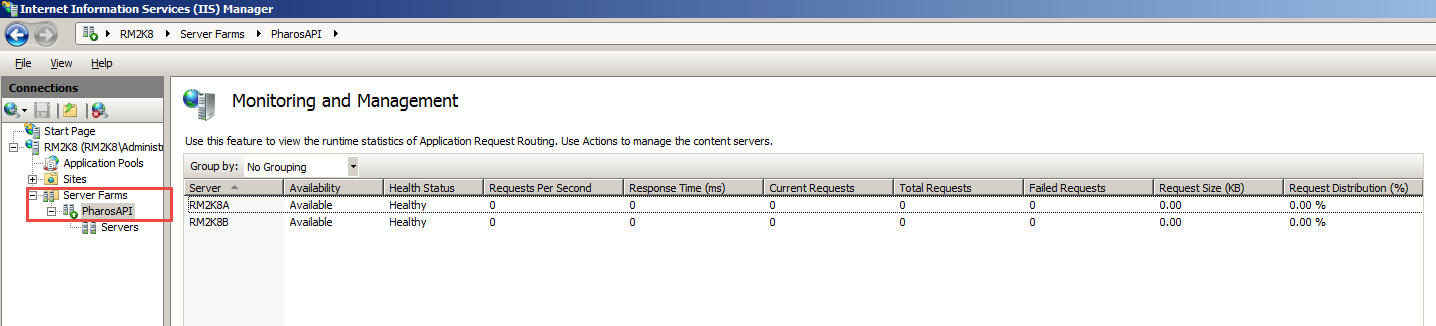
Monitor and Manage the Server Farm
This feature allows you to monitor and manage servers on your farm. The Monitoring and Management feature includes information such as the health status of the server (i.e. whether it is healthy or unhealthy), the availability of the server, the number of failed requests, the number of responses received from the server and so on.
1. Select the desired Server Farm, and then double-click on the Monitoring and Management feature.
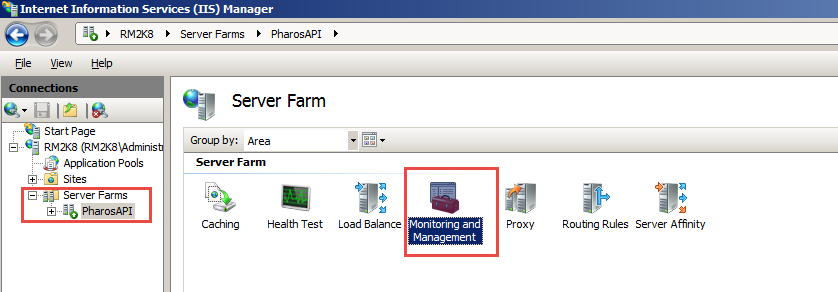
2. This opens the Monitoring and Management page, which contains information about servers in your farm.
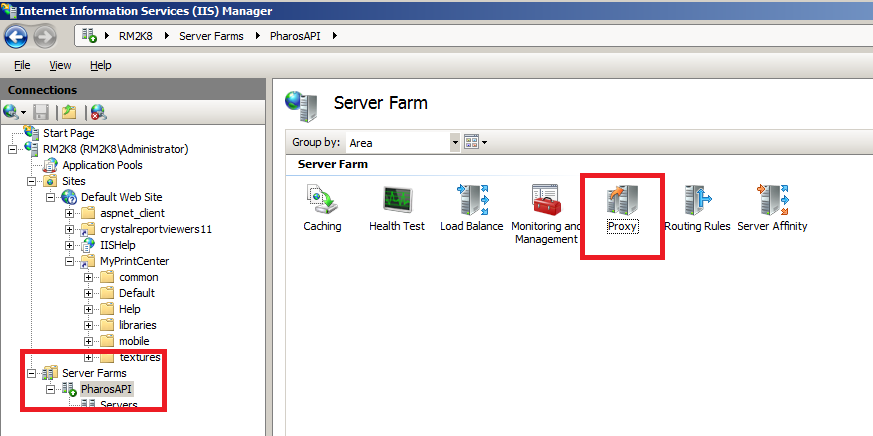
Update Proxy settings
This section shows you how to update the time out in the proxy settings.
1. Select your Web Farm and then double-click on the Proxy feature.
2. Set the Time-out setting to 120 seconds or greater. The Server Farm Proxy time-out should be equal or greater than the ARR Proxy settings. By default, Server Farm Proxy time-out is set to 30 seconds, update the time-out as per ARR proxy settings (see page 7).
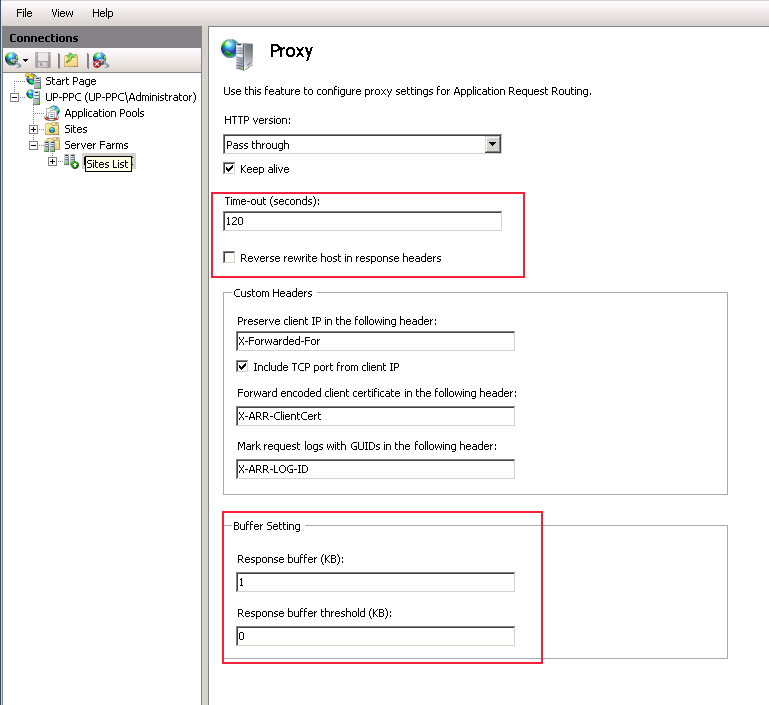
Also, you will need to make sure that the Reverse host in response headers option remains unchecked or the redirection to the servers will not work.
After configuring the above features, the next step is to perform the following tasks as described in Scenario 1:
- Enable proxy in ARR. Follow the steps outlined in “Enable Request Routing in ARR”
- Export the certificate from the Print Center Service (Pharos API). For more information, refer to “Exporting Certificate” section.
- Import the certificate to the Print Center Web. For more information, please refer to the "Importing Certificate" section.
- Verify the health of Pharos API servers. Refer to the Verify Pharos API health section.
You have now finished setting up your Pharos Print Center on ARR. The next step is to configure Uniprint to work with the Pharos Print Center. Authentication, charging, costing, and printing components should be set up first before logging on to the Print Center website. For more information on how to set up Uniprint for Pharos Print Center, please refer to the “Pharos Print Center Guide” found in the Pharos Community.