About Branches
![]() The Branches
context contains an entry for each physical location where computers are
available for reservation. Associating a computer with a branch allows
the SignUp system to determine which computers can be presented to a user
making a reservation at any given location.
The Branches
context contains an entry for each physical location where computers are
available for reservation. Associating a computer with a branch allows
the SignUp system to determine which computers can be presented to a user
making a reservation at any given location.
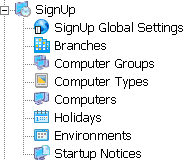
The Branches context is available under SignUp in the Context Tree.

Branches Properties
General |
Adding a New Branch
To add a new Branch:
- In the Branches
Actions Pane, select the Insert button
(
 ). This opens the Insert
Branch dialog which collects the necessary information and creates
a new Branch entry with it.
 - In the Insert Branch dialog box, configure the following properties. Note that a property with a small error icon next to it are mandatory properties. You have to supply values to these properties in order to complete adding a new branch.
|
General Properties |
Do this |
|---|---|
|
Name |
Enter a name for the new branch |
|
Description |
Enter a description for the new branch |
|
SignUp Server |
Select the SignUp Server that the new branch will use. |
- Click OK. The new Branch entry is inserted into the Pharos Database.
Deleting a Branch
To delete an existing Branch entry,
select a branch and click the Delete
option on the Branches context Actions pane ( ![]() ).
).
Branch Properties
The following properties can be viewed and/or configured for branches:
| Property | Description |
|---|---|
| Name |
This name uniquely identifies the branch. The name is not displayed to users (although it is displayed to staff on the Nerve Center application) |
| Description |
This description is displayed to the administrator only, and can be used to provide extra information about the branch. |
| SignUp Server
|
This property displays the SignUp Server associated with the branch. The SignUp Service running on the server monitors and controls the use of all computers in the branch. |