Customizing Pharos Station: Print Center mode
This section covers how to customize Pharos Stations in Print Center mode. If you are running Pharos Stations in Legacy mode, please refer to the Customizing Pharos Stations: Legacy mode topic.
The overall appearance of a Pharos Station in Print Center mode can be customized in the Theme tab of the Pharos Print Center. You will need administrator privileges to access the Theme tab in the Print Center.
You can customize the following element of the Pharos Station: Print Center mode:
- Screensaver
- Logon Page
Changing these settings also affects the Print Center website for all users.
Customizing the Screensaver
You can customize the screensaver on your Print Center Pharos Station so it matches your organization’s branding and color scheme. The following image is the default screensaver that you see when you first install the Pharos Station in Print Center mode. The numbers show which elements of the screensaver can be modified in the Release Station.
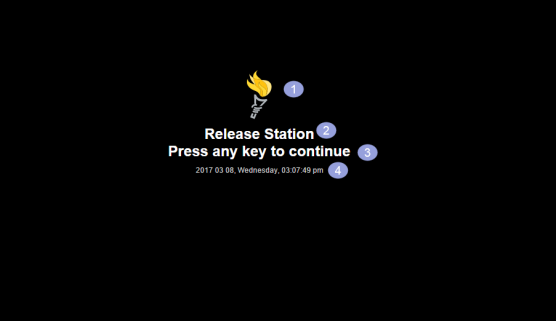
1. Logo
To change the logo on the screen saver, navigate to the Theme > Logos tab in Print Center, and then change the default Header Logo to your desired image.
This also updates the main header logo on your Print Center website.
2. Release Station Name
To change the default name of the Release Station, navigate to the Theme > Text tab, select the Release Station Screen Saver text group, and then update the Release Station Name field to your desired name.
It is possible to add more than one line of item in this field.
3. Press to continue text
To change the Press to continue text, navigate to the Theme > Text tab, select the Release Station Screen Saver text group, and then update the Press to continue Text as appropriate.
4. Screensaver Date and Time Format
To change the format of the date and time on the screen saver, navigate to the Theme > Text tab, select the Release Station Screen Saver text group, and then update the ScreenSaver Date Time Format field.

Customizing the Logon Page
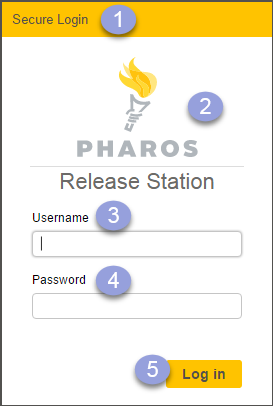
You can change the following elements of your Release Station login page.
1. Title Bar
To change the color of the title bar on your login page, navigate to the Theme > Colors tab of Print Center and update the Form Header Color.
2. Logo
To change the log on the logon page, navigate to Theme > Logos and then update the Header Logo.
3. Username Label
To change the label on the username field, navigate to the Theme > Text tab, select the Login text group, and in the Login username label field, replace the default text to your desired text.
4. Password Label
To change the label on the username field, navigate to the Theme > Text tab, select the Login text group, and in the Login password label field, replace the default text to your desired text.
5. Login text and button
To change the login text, navigate to the Theme > Text tab, select the Buttons text group, and in the Login Button field, replace the default text to your desired text.