Uniprint Technote: Pharos Chrome Print
- Overview
- Prerequisites
- Pharos Chrome Print Components
- User Authentication
- User Self-Registration Workflow
- How does Pharos Chrome Print work?
- Configuring Pharos Chrome Print
- Other Configuration Options
- Deploying the Chromebook Extension
- Pharos Chrome Print on ARR or HAProxy
- Customizing the self-registration email messages
- Pharos Chrome Print Settings
- Troubleshooting Pharos Chrome Print
Overview
In late 2019, Google announced that it will no longer support its cloud-based printing service, Google Cloud Print (GCP) from December 31, 2020. Uniprint 9.1 SP3 or later offers the Pharos Chrome Print to replace the Google Cloud Print solution introduced in Uniprint 9.1.
Key features of the Pharos Chrome Print:
- It allows users to print from Chromebook™ or Chrome browser (on Windows and Mac)
- No print drivers required on users’ machines
- Documents sent via the Pharos Chrome Print are controlled just like standard Uniprint jobs
Prerequisites
Pharos Chrome Print requires the following:
- Uniprint 9.1 SP3 or later
- Print Center v4.11 or later
- Pharos IPP Service
- Optional (MobilePrint 2.3 or later). Starting with Uniprint 9.2, Chrome Print jobs are submitted as normal IPP jobs and can only be released from an IPP printer. There is a new setting in Print Center called Use MobilePrint to render Chrome Print jobs which controls whether or not MobilePrint is used to render Chrome Print jobs. Refer to the Server Settings section in the document for more information about this new setting.
Pharos Chrome Print Components
| Component | Description |
|---|---|
|
Pharos Chrome Print extension |
Pharos Chrome Print is the Chrome browser extension that allows users to print to Pharos Print Servers from Chromebooks and Chrome browsers. The Pharos Chrome Print extension is responsible for:
|
|
Pharos IPP Service |
The Pharos IPP Service is responsible for:
The Pharos IPP Service runs as a web application within IIS, in a virtual directory, using port 443. The Pharos IPP Service must be installed on the same machine as the Uniprint Print Services and the Pharos API. |
|
Pharos Chrome Printer |
After installing and configuring the Pharos Chrome Print, a single virtual queue is added to the printer list of Chrome. This queue is called the Pharos Chrome Printer by default. The Pharos Chrome Printer acts as a secure print queue and is not associated with any device. When a user prints a job to the Pharos Chrome Printer, print jobs are not immediately released to an actual printer. Print jobs are stored in the Secure Release job store until they are released by the user from the Print Center, Terminals, and Pharos Stations or purged after expiry. The Pharos Chrome Printer has the following print options:
The default print options are Letter, Mono, Duplex, 1 copy, Collate, and Portrait. You can change the default printer name from the Pharos database if desired. Refer to the Changing the Printer Name section of this document for instructions. |
User Authentication
Pharos Chrome Print requires that user accounts exist in the Pharos Database and have associated Google mail accounts to identify incoming print jobs. There are two ways to add users’ Google accounts to the Pharos Database.
- Pre-populate the Pharos Database with users’ Google mail accounts. We recommend using the Batch User Load tool to import the Google accounts of multiple users.
- Allow users to self-register.
When a user configures Pharos Chrome Print for the first time, the Chrome extension checks with the Pharos API if the user’s Google mail account is already registered (i.e. already exists in the Pharos Database). If the Google account is in the database, the documents are processed as usual. If the Google mail account does not exist in the database and self-registration is configured, an email is sent to the user with a link to register their Google account.
When a user configures Pharos Chrome Print for the first time, the Chrome extension checks with the Pharos API if the user’s Google mail account is already registered (i.e. already exists in the Pharos Database). If the Google account is in the database, the documents are processed as usual. If the Google mail account does not exist in the database and self-registration is configured, an email is sent to the user with a link to register their Google account.
User Self-Registration Workflow
1. A user whose Google account is not in the Pharos Database configures the Pharos Chrome Print extension.
2. The user receives an email to self-register.
3. The user clicks the Click to register your email address link within the email. The Pharos Print Center logon screen appears.
4. The user logs in to Print Center using their Uniprint credentials.
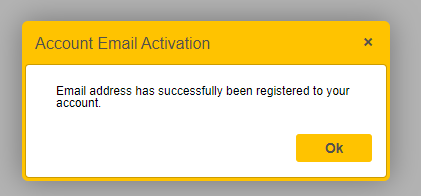
If the user’s credentials match a user account in the Pharos Database, a dialog box with the message ‘Email address has successfully been registered to your account’ appears. The user’s Google account is associated with its Uniprint user account.
5. The user must return to the Chrome extension and complete the configuration after they have registered.
6. The user can now submit jobs to the Pharos Chrome printer using the Print dialog in Chrome, or in the Chromebook apps.
User self-registration for Pharos Chrome Print uses the same email registration process as MobilePrint. If email registration in MobilePrint is already configured, no other configuration is required for Pharos Chrome Print self-registration.
For information on how to configure self-registration for Pharos Chrome Print, refer to the Configure User Self-Registration section of this document.
How does Pharos Chrome Print work?
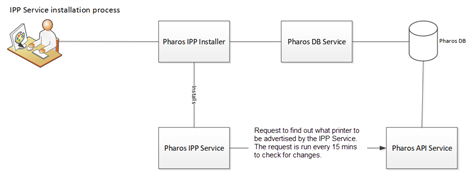
The Pharos Chrome Print solution consists the Pharos Chrome Print extension, the Pharos IPP Service, and Pharos MobilePrint. The following shows the key interactions among these components.
The system admin installs prerequisites (applies to Uniprint 9.1 only)
1. The administrator applies SP3 to Uniprint 9.1. This installs the components required to support Pharos Chrome Print.
2. The administrator installs the Pharos IPP Service using the .msi installer provided.
3. The administrator installs or updates Pharos MobilePrint (if required).
The system admin updates Uniprint 9.1 to Uniprint 9.2
Upgrading from Uniprint 9.1 to 9.2 installs the IPP Service required to support Pharos Chrome Print extension.
The user installs and configures the Pharos Chrome Print extension
1. On the Chrome browser, the user installs the Pharos Chrome Print extension.
2. The user configures the Pharos Chrome Print extension. The configuration includes adding the Print Center Server name and clicking a Submit button.
During configuration, the Pharos Chrome extension does the following:
- It talks to the Pharos API to find out the Pharos IPP Server(s) to talk to.
- It talks to the Pharos IPP Service to get printer(s) to add
- Checks with the Pharos API if the user email address is already registered:
- If the user email address is already registered, the configuration is complete.
- If the user email address is not registered, and the user registration is enabled, the extension will tell the user to check the email. If user registration is not enabled, the user will get the User Registration Unavailable message.
3. Upon successful configuration of the extension, the Pharos Chrome Printer is added to the printer list in Google.
The user submits and releases the print job
1. The user submits a document to the Pharos Chrome Printer.
2. The Pharos Chrome Print extension gets the CDD (Cloud Device Description) settings of the printer from the IPP Service displayed as print options to the user (e.g. mono, two-sided, copies). The user changes the print options if desired.
3. The Pharos IPP Service calls the Secure Release Service to add the documents to the Secure Release job storage.
Documents remain in the Secure Release directory until they are released by the user or are purged after expiry.
4. The user walks up to the printer (managed by Uniprint), authenticates, and releases the document.
5. The user collects the printed documents from the printer tray.
6. The print job information is stored in the Pharos database for reporting purposes.
The Pharos IPP Service polls the Pharos API for printers every 15 minutes. If you’ve changed the attributes or the printer name, for example, it will take about 15 minutes for the changes to take effect.
Configuring Pharos Chrome Print
Before you begin
Check the following prerequisites before configuring Pharos Chrome Print
- Uniprint 9.1 SP3 or later
- Print Center v4.11or later
- Pharos MobilePrint 2.3 or later. Starting with Uniprint 9.2, Chrome jobs are submitted as normal IPP jobs can only be released from an IPP printer.
- A Google account to test the Pharos Chrome Print solution
Step 1: Installing the Pharos IPP Service (Applies to Uniprint 9.1 SP3 only)
The following steps apply to customers updating Uniprint 9.1 with SP3. Skip this step if you are upgrading to Uniprint 9.2. Installing 9.2 or upgrading from Uniprint 9.1 to 9.2 installs the IPP Service required to support Pharos Chrome Print extension.
Install Prerequisites
- Visual Studio 2015 (x86) runtime
- .NET Core Windows Server Hosting 3.1.3 or greater
- If installing Pharos IPP Service on Windows Server 2012 R2 or Windows Server 2016, you’ll need to restart the Windows Process Activation Service.
The IPP-Service.zip file includes the IPP Service installer as well as the prerequisites. You can download this zip file from the Pharos Community. Look for the Pharos IPP Service Component.
Installing the Pharos IPP Service
The Pharos IPP Service must be installed on the same machine as the Pharos API Service. While only one instance of the IPP Service is required, you can install multiple instances of the service for load balancing.
- Download the Pharos IPP Service installer from the Pharos Community.
- Copy the IPP Service installer to your Uniprint Print Server.
- Run the installer PharosIPPServiceSetup.msi and then follow on-screen instructions.
- After installing the Pharos IPP service, perform a health check using your browser by running the following https://<servername>/ipp/health-check. If the following error is returned HTTP Error 502.5 - ANCM Out-Of-Process Startup Failure, restart the Windows Process Activation Service.
Step 2: Optional (Updating Pharos MobilePrint to v2.3)
A new setting called Use MobilePrint to render Chrome Print jobs has been added to Uniprint 9.2. It determines whether to use MobilePrint to render Chrome Print jobs or not. In Uniprint 9.1 SP3, Uniprint received Chrome print jobs via the Pharos IPP service and were processed through MobilePrint. Chrome Print jobs were converted to MobilePrint jobs when added to Uniprint. If installing 9.1 SP3, you will need to install MobilePrint 2.3.
Starting with Uniprint 9.2, Chrome jobs are submitted as normal IPP jobs and can only be released from an IPP printer.
- When the setting is disabled, Chrome Print jobs are processed as IPP jobs and are released to IPP printers. This is the default for new Uniprint 9.2 installs.
- When the setting is enabled, MobilePrint is used to render Chrome Print jobs. This is the default for sites upgrading from Uniprint 9.1 SP3 can continue to work after upgrade.
This setting requires a restart of all Secure Release Services.
Step 3: Installing the Pharos Chrome Print extension
You cannot install extensions in Incognito or Guest mode in Chrome.
For Chrome browser users, make sure that Sync is enabled. To turn on sync in Chrome browser, refer to this Google document.
1. Log in to your Google Account (if you are not already logged in).
2. Navigate to the Chrome Web Store.
3. Search for the Pharos Chrome Print extension.
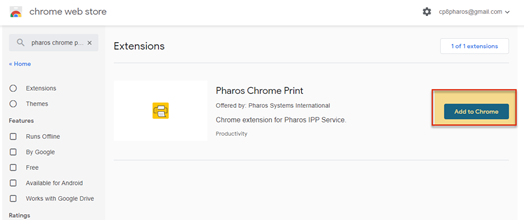
4. Select Add to Chrome.
5. In the screen that appears, click Add extension.
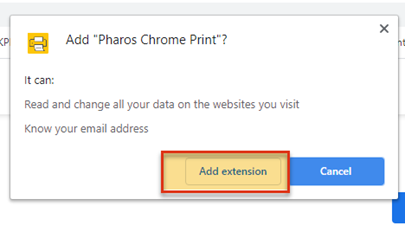
You will see a message that Pharos Chrome Print has been added as an extension to Chrome.
Step 4: Configuring the Pharos Chrome Print Extension
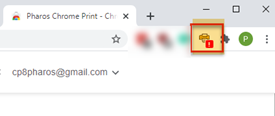
1. Click the Pharos Chrome Print from the list of pinned extensions.
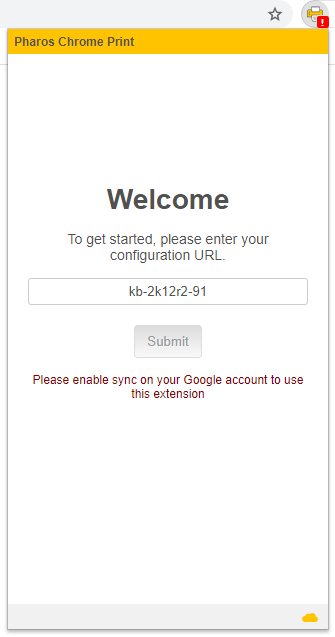
2. The Configuration dialog box opens. In the Configuration URL field, enter the server name of your Print Center. Your administrator will provide this information to you.
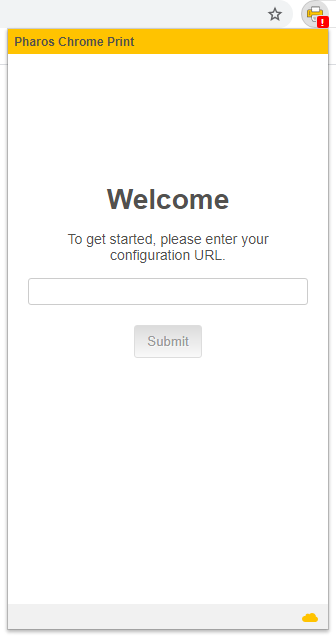
3. Click the Submit button.
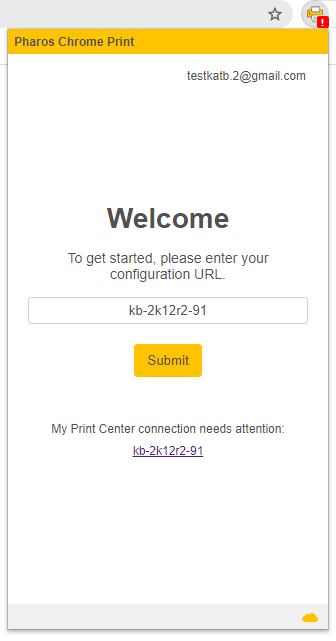
- If your email address is not in the Pharos database, you will get the following screen asking you to register your account first.
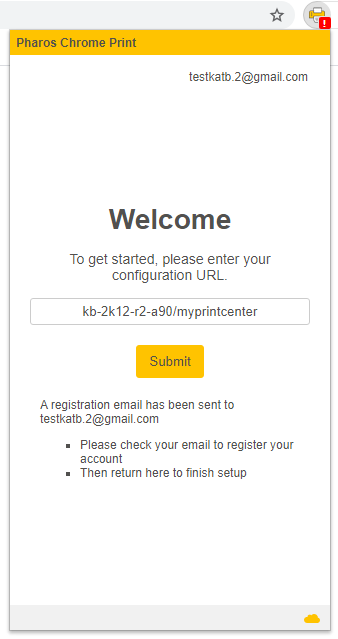
- Check your email to register your Google account.
- Once the email is registered, go back to the extension, and click Submit again.
• If your email address is in the Pharos Database, the configuration is complete.
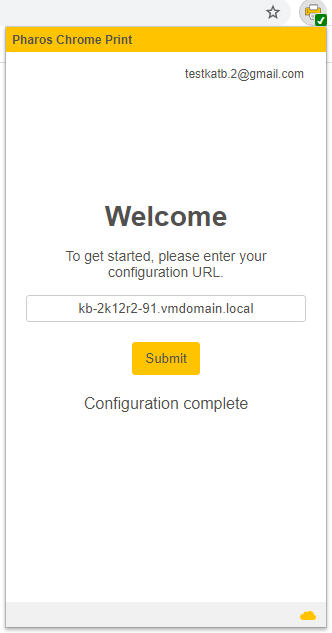
4. The Pharos Chrome Print icon will have a green check mark once successfully configured.
Step 5: Configure users’ Google accounts
In this step, choose how you want to add your users' Google email accounts into the Pharos Database. There are two options:
- Configure User Self-Registration
- Pre-populate the Pharos Database with users' Google accounts.
Configure User Self-Registration
To allow users to self-register:
- Log in to Pharos Print Center and navigate to the Admin > Chrome Print tab.
- In the User Self Registration section, ensure the following settings are configured:
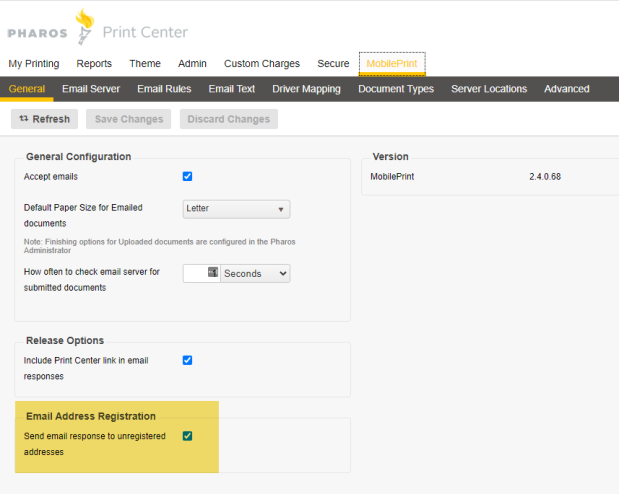
- Email Address Registration - This enables the following MobilePrint settings from the MobilePrint > General tab.
- Accept Emails
- Email Address Registration
- MobilePrint Email Server - If not already configured for MobilePrint, you’ll see the Requires Configuration link. If the email server settings have been configured for MobilePrint you’ll see Review Configuration.
Clicking the Requires Configuration or the Review Configuration link takes you to the MobilePrint > Email Server tab of Print Center. In this tab, you can configure or review the Print Email Settings and Account Type of your email server. For more information, please refer to Configuring Email Server section of the Pharos Print Center Help.
Click the Test button to check if the Email Server settings are configured correctly.
Pre-populate users’ Google accounts in the Pharos Database
Use the Batch User Load tool to import the Google mail accounts of multiple users. For more information on how to use the batch loader, please refer to the Uniprint Help. Search for Batch Load Technical Information or Batch Loading Users topic.
Step 6: Test Pharos Chrome Print extension
To ensure that Pharos Chrome Print is working, you need to test whether you can send a print job and can release those jobs from actual printers
6.1 Send a print job to the Pharos Chrome Printer
1. From your Chrome browser, open a document, images that you want to print. You can open documents from Google Docs, Google Drive, etc.
2. Print the document
- Windows & Linux : Ctrl + P or File Print.
- Mac: ⌘ P
3. In the Destination field, click the down arrow and select Pharos Chrome Printer from the list. If you do not see it, select See More… and search for the printer.
4. (Optional) Change print options if desired. Click More settings to see more printing options.
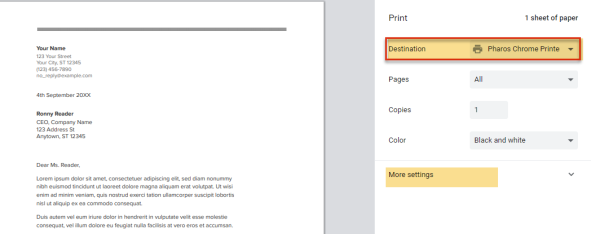
5. Click Print.
6.2 Release the job from a printer
1. Log into Print Center using the Pharos account of the test user.
2. You should be able to see the job you sent to the Pharos Chrome Printer.
3. Select the job you want to release and the desired printer to release the job.
6.3 Test self-registration
1. Use a Google account that is not associated with a user in the Pharos Database
2. Add the Pharos Chrome Print extension and configure it.
3. After successfully adding and configuring Pharos Chrome Print, submit a print job to the Pharos Chrome Printer.
4. You’ll receive a message to complete your registration.
5. Open your email and click on the Click to register your email address link. You will be redirected to the Pharos Print Center website.
6. Log in to Pharos Print Center with your Uniprint username and password. You will receive a message 'Email address has successfully been registered to your account'.
7. Return to the Pharos Chrome Print extension and complete the configuration step.
8. Click OK. Verify that the Google account has been added to the Email property of the user account.
Other Configuration Options
Changing the Printer Name
You can change the Printer Name setting in the Admin > Chrome Print tab of Pharos Print Center. This tab is available from Print Center v4.11.2 or greater only. This tab was not available in Print Center v4.11.1.
Pharos Chrome Print installs a printer called Pharos Chrome Printer. If you want to use a different name for your printer, you can update the database manually. Alternatively, you can change the Printer Name from the Admin > Chrome Print tab (if available).
To change the Pharos Chrome Print printer name in the database:
1. Open SQL Management Studio and then find the pharos database.
2. Find the print_center_settings table.
3. Locate the IPP Service > Pharos Chrome Printer Settings record at the end of the table.
4. Change the value of the PrinterName to your desired name.
5. Restart the Pharos API in the System > System Settings > Print Center context of Pharos Administrator by clicking the Restart Pharos API button.
Notes:
- Wait up to 15 minutes for the new printer name to apply or you can kill the dotnet.exe application (on the server where your IPP Service is installed) using the Windows Task Manager.
- Close the print dialog and reopen to see the new printer.
Handling Certificate Issues
To initially configure Pharos Chrome Print, you will need to click on the Submit button in the extension’s configuration dialog box. When clicking the Submit button, the Pharos Chrome extension talks to the Pharos API to get a list of Pharos IPP Servers to talk to. After the extension gets the name of the Pharos IPP Servers, the extension attempts to talk to those IPP servers over HTTPS. Communication between the Chrome extension and IPP Service is over HTTPS, so it is affected by certificates. This means that Print Server will need a valid certificate on it.
The following section shows issues that you may encounter related to server certificates.
Invalid Certificates
The following screen appears when the Pharos Chrome extension cannot connect to the Pharos API Service, possibly because the certificate installed on the Pharos API server is not considered valid, as in the case of self-signed certificates.
To resolve this issue, install a valid certificate on your Pharos API.
The following screen appears when the Pharos Chrome Print extension cannot talk to the Pharos IPP Service, possibly because the certificate installed on the Pharos API server is not considered valid, as in the case of self-signed certificates. To fix the certificate issue, install a valid certificate on the server(s) where the Pharos IPP Service is installed.

Certificate on the Pharos IPP Service is valid but with a different server name
The Pharos Chrome Print extension connects to the Pharos IPP Service using the server name as recorded in the Pharos database. By default, server names in the Pharos database are short hostnames. If the server has a valid FQDN certificate installed, but the Chrome extension connects to the server using the hostname (as it receives from the database), this will cause a certificate exception because the short hostname and the FQDN don't match.
To resolve this issue, you can specify an override server name to use for the IPP server. The override server name is stored in the database and when the extension asks the API for details of the IPP server to talk to, it will be provided with this override server name rather than the machine’s name (as it is known in the pharos database).
For example, a server called UP-Mobile-iOS is in the pharos database, but is known to the world as pharosprint.pharos.com, with a matching certificate.
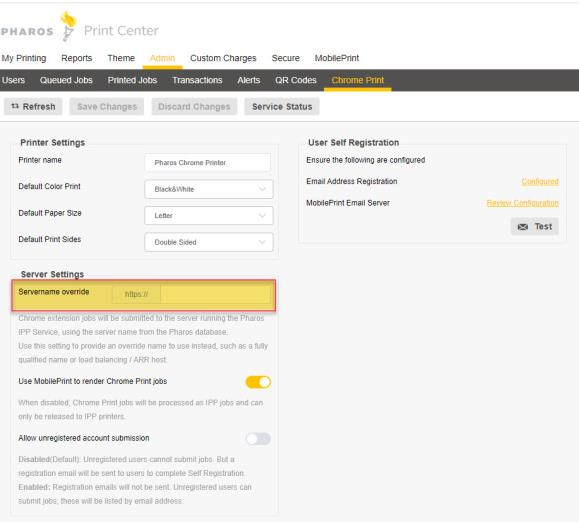
The following shows instructions on how to add an override server name to the database settings so that the extension will connect to the IPP service using that override server name:
You can change the IPP Service Servername override in the Admin > Chrome Print tab of Pharos Print Center. This tab is available from Print Center v4.11.2 or greater only. This tab was not available in Print Center v4.11.1. The following image shows the IPP Service Servername Override setting in the Chrome Print tab of Print Center.
1. Open SQL Server, open the Pharos database, find the print_center_settings table.
2. Right-click on the print_center_settings table and choose Edit Top 200 Rows.
3. Find the IPP Service > Pharos Chrome Printer Settings record at the end of the table.
4. Find the “IPPServerOverride” property and set it to true.
5. Find the property “IPPServerURI” and set the value to the other name (pharosprint.pharos.com in the example above).
6. In the System > System Settings > Print Center context of Pharos Administrator restart the Pharos API by clicking the Restart Pharos API button.
7. Restart the IPP Service to get the new details. Do this by opening the Windows Task Manager and ending the process dotnet.exe.
8. Do another test of the IPP service health:
https://pharosprint.pharos.com/ipp/health-check
If the Override value is set to true, and the IPPServerURI value is left empty, then the Print Center Hostname URI will be used instead.
Pharos Chrome Print on ARR or HAProxy
When Print Center is deployed using the Microsoft Application Request Routing (ARR) feature of IIS or has load balancing via HAProxy, you will need to do extra configuration for Pharos Chrome Print to work. This section details those steps.
Update the Database (for sites with ARR or HAProxy)
Typically, Pharos Chrome extension jobs are submitted to the server running the Pharos IPP Service. When Print Center is deployed using ARR or is set up for load balancing via HAProxy, you can enable the IPPServiceOverride and set the IPPServerURI to the ARR server/load balancer so that the Chrome extension can send print jobs to the ARR server or the load balancer. The ARR server or load balancer then forwards the print jobs to the IPP servers.
This is particularly useful in situations where you want to be able to print from outside your network, for example. Chrome extension can send jobs to the ARR server in the DMZ, and then via the rewrite URL, sends the jobs on to the IPP Server.
Use the instructions above to update the Servername Override, setting the override value to that of your ARR or load balancer servername.
Create a URL Rewrite (for ARR sites with a single IPP Server only)
If you have an ARR setup with a single IPP Server, you’ll need to configure a URL Rewrite rule that will send Chrome print jobs from the ARR on to the IPP Server. This step is not required for sites with a server farm.
To create a URL Rewrite:
1. Expand Sites, click on the Default Web Site, and then double-click on the URL Rewrite option. If you cannot find the URL Rewrite option, you need to install this module.
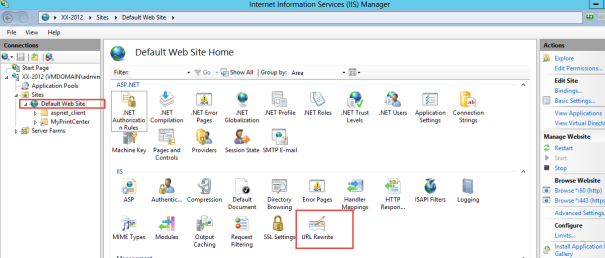
2. The URL Rewrite screen opens. In the Actions pane, click Add Rule(s).
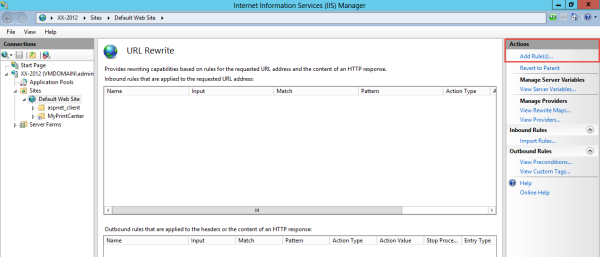
3. In the Add Rule(s) dialog box, click on the Blank Rule and then click OK.
![]()
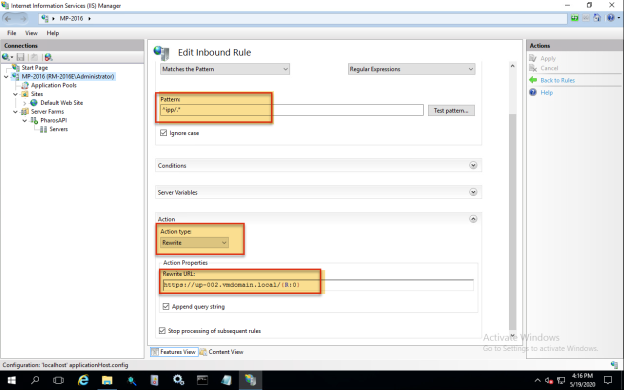
4. Define the URL Rewrite rule by providing information, such as the name of the rule, pattern to use for matching the URL string, and the Rewrite URL pattern. All URLs matching the pattern will redirect requests to the IPP Servers.
a. In the Pattern field, enter the following string: ^ipp/.*
b. In the Action Type drop-down list box, select Rewrite.
c. In the Actions Properties, enter the string
https://<PharosIPPServerName>/{R:0}
This string tells the ARR which server to call and how to make the call.
Refer to the Technote Pharos Print Center Deployment Strategy in the Pharos Community for instruction on how to create rewrite rules to redirect requests to the Pharos API server and to route all PayPal traffic to the selected Pharos API Server.
Update the HAProxy config file (for sites with HAProxy only)
If you have configured load balancing for Uniprint using High Availability Proxy (HAProxy), you’ll need to update your haproxy.cfg files with the following lines:
frontend ipp_front
bind *:443
default_backend ipp_back
mode http
backend ipp_back
balance source
server RM-2016 10.0.2.244 check port 443
server RM-2K12R2B 10.0.2.88 check port 443
mode http
Replace the names RM-2016 and RM-2k12R2B with the Uniprint print servers of your print environment.
Customizing the self-registration email messages
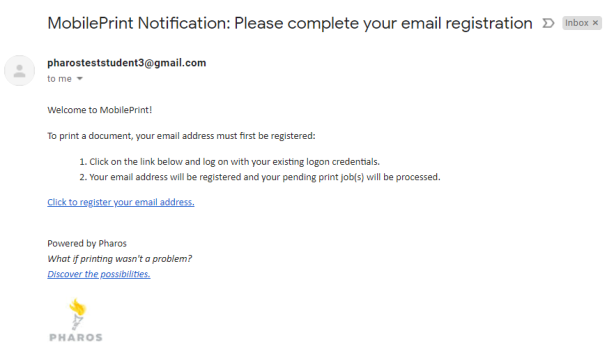
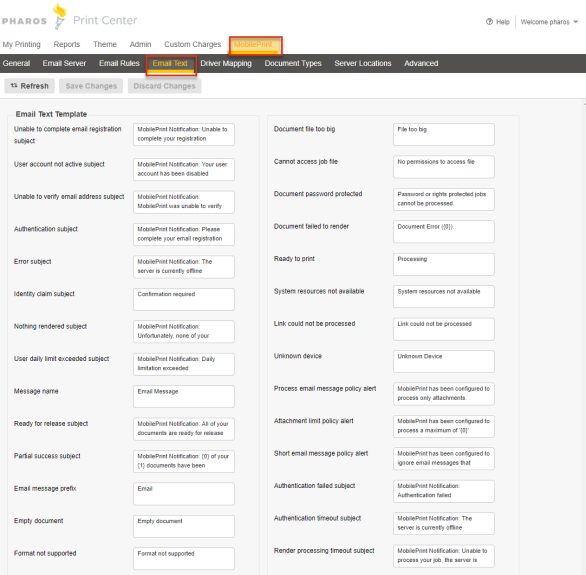
The self-registration email sent to users contains MobilePrint specific messages, you will need to edit the email subject line and the body of the email as you see fit for Pharos Chrome Print. For example, the subject line of the self-registration email shows MobilePrint Notification: Please complete your email registration. The message “Your mail address will be registered and your pending print jobs will be processed” is also not suitable for Pharos Chrome Print. You can update it to say “Return to the Pharos Chrome Print extension and click Submit once more to complete your setup of the extension” or something similar.
You can update these messages in the Print Center (MobilePrint > Email Text tab).
The following image shows the email registration text.
Customizing the body of the self-registration email
You can customize the text of the email body by editing the email templates that are shipped with MobilePrint.
1. On your MobilePrint Server locate this folder C:\ProgramData\PharosSystems\MobilePrint\EmailResources.
2. Select the DefaultAuthenticationTemplate.
3. Using a text editor such as Notepad++, edit the template as per your requirements.
4. Save changes.
Deploying the Chromebook Extension
As an administrator, you can easily deploy the Pharos Chrome Print extension to all Chromebook or Chrome users using the Google Admin Console. This means that the extension is automatically installed on users' Chromebooks or Chrome browsers.
Refer to the Deploying the Chromebook Extension document for information on how to mass deploy the Chromebook extension using the Google Admin Console.
Pharos Chrome Print Settings
You can find information on the Pharos Chrome Print Settings available in the Print Center in the Uniprint Print Center Pharos Chrome Print document in the Pharos Community.
The Chrome Print settings tab is available from Print Center v4.11.2 or greater only. This tab was not available in Print Center v4.11.1.
Troubleshooting Pharos Chrome Print
1) The following screen shows when user registration is not enabled in MobilePrint.
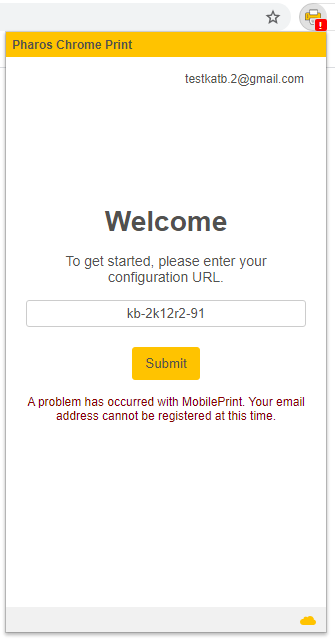
To resolve this issue, log in to Print Center. Navigate to MobilePrint > General tab and select Email Address Registration.
Once email registration is enabled, you’ll need to configure the Pharos Chrome extension by clicking the Submit button again. You’ll receive an email asking you to register your Google account.
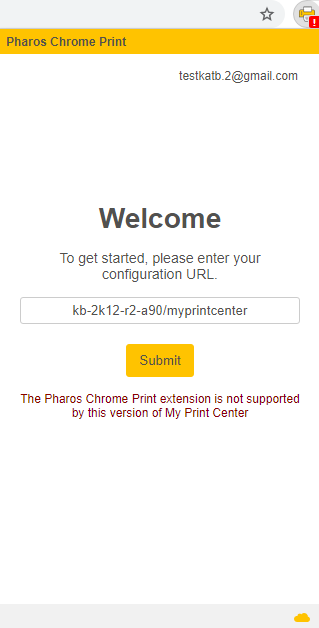
2) The following screen appears when you are running a version of Print Center earlier than v4.11. Install Print Center v4.11 or later.
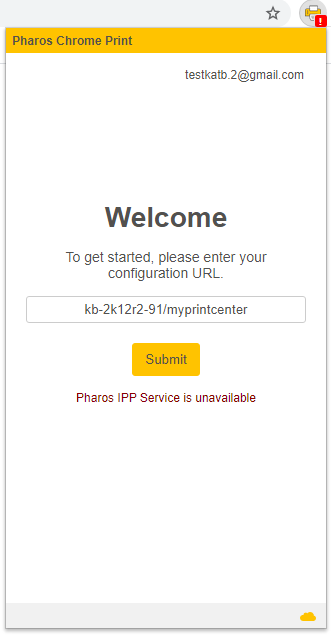
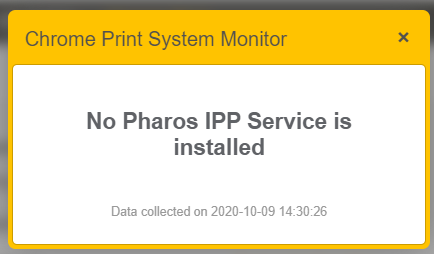
3) The following screen appears if the Pharos IPP Service has not yet been installed. Install at least one Pharos IPP Service on any of your Uniprint Print Server.
4) The following screen appears when Sync is not enabled on your Google Account. To turn on sync in Chrome, refer to this Google document.
5) This screen appears when MobilePrint is not installed or one of the MobilePrint Services has stopped. Install MobilePrint 2.4 or if it is already installed, check whether the MobilePrint Workflow or Worker Service is running.

6) The following screen appears when you run the Service Status test for IPP and IPP Service is not installed.
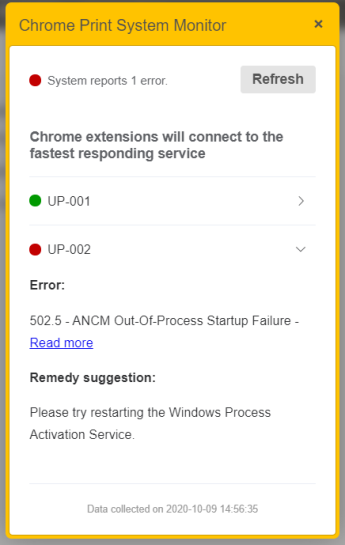
7) The following screen appears when the Service Status test for IPP Service reports an error.
Pharos Chrome Print Alert
| Alert Code | Message | Description |
|---|---|---|
|
29067 |
Failed to add job. Exception: The Secure Release operation 'AddJob' failed. Rejected job from user 'ADMINISTRATOR' via IPP server as it's not printing from Pharos Chrome Extension. |
This alert occurs when a print job sent via IPP Service is not tagged as a Pharos Print Chrome extension job. The Secure Release Service rejects any job without the Pharos Chrome Print tag. |